3 DIY Gifts for Friends (So Good You Want to Keep)

If you’re looking for clever, unique, and creative gift ideas, take a look here! I’ve put together a list of 3 amazing homemade gifts for adults! They are fabulous and I guarantee you’ll find something here that your special friend or family member will just love! These are all-occasion handmade gifts ideas for friends – perfect for Christmas or any time of the year! You can also give them to neighbors, co-workers, or anyone you’d like to treat! Keep reading to get inspired!
The Genius of Handmade Gifts
I’m not sure why this never really crossed my mind before. I have little ones (5-year-old twins), and making craft presents for the adults in our lives, from the kids, is something we do all. the. time.
But it’s hard for me to believe that it took a Facebook post from someone else to clue me in to the genius of handmade Christmas gifts (or any occasion gifts) for adults – for family, friends, etc.
Last year, a blogger I follow mentioned that she and her sister were exchanging DIY gifts for Christmas. Oh my gosh… I really can’t believe I never thought of doing that with my sisters.
I mean, we may have done it randomly over the years, but it was never an organized ‘thing.’
Til this year.
So after I saw that post, I immediately went to Pinterest and starting pinning homemade gift ideas for adults.
And I knew I wanted to do a post on this – for y’all, for sure – but for me! Because this was now going to become ‘a thing’ for me and my sisters.
Right now, it’s mid-August, and I’ve already text messaged my 3 sisters and asked if they’d be into doing it this year. It was a unanimous ‘yes,’ so game on!
Why Homemade Gifts for Adults are Such a Great Idea
If you’re here, I don’t think you need convincing – and I might be stating the obvious, but here’s why handmade gifts are so genius:
Budget-Friendly
Most of the time, it will cost less to make a gift than to buy it, especially if you use thrifted or upcycled materials. And yes, that’s perfectly acceptable to do.
Personal
Not only can you personalize the gift to your friend’s tastes and likes, it’s so much more personal for them to receive a gift that you put time and energy into.
Fun
It really, really is a lot of fun to do this. Yes, sometimes annoying if you hit a snag, but mostly fun!
1. Charming & Rustic DIY Farmhouse Wreath

I am so excited to share with you how to make your own charming DIY farmhouse wreath! This beautiful DIY door wreath makes a wonderful gift idea or household decoration. It’s super versatile and can be used to add charm and character to any room in the house too. Plus, making your own home decor is a fabulous way to spend the day.
Whenever I get in the mood for crafting, I just can’t get it to go away! If you are a person who loves making things, you totally get what I am saying, right? 😉 My poor husband gets stranded In Hobby Lobby or other stores with me, thank goodness for cell phones so he can entertain himself when he is bored to tears. HA!
I always love to make things that I think other people will like or that could be given away as a gift too. So, if you are looking to make your own gifts, then this one is sure to impress your friends and family members. Another great idea is you could sign up to sell these at craft shows or other community events too. You might as well make some money!
How To Make A Farmhouse Wreath
This spring wreath is super simple to throw together, and you need very few supplies. Take a look at these easy steps:
First Step: Begin by placing the chipboard cut out on top of the embroidery hoop. This will help you get an idea of how to center it evenly.
Second Step: Once the chipboard in position as you would like, you can take a pencil and make small marks on the hoop, so you know where to add the hot glue. You want to be sure you mark the two sides where the chipboard will be pressed to the hoop.
Third Step: In order to not make a mess with the hot glue or have it showing where you don’t want, only add generous dabs to the marked areas.

Fourth Step: Quickly press the chipboard onto the glue dabs. If you need to shift or center the word, make sure you move it quickly while the glue is still soft.
Fifth Step: Hold the word in place until it is secure. You can now turn the hoop over and add additional drops of hot glue under any part of the word that may need some. Allow drying time.
Sixth Step: Cut the faux blooms from their stems. Add a small dab of glue to the embroidery hoop and press the blooms in place. You can add as many flowers as you wish. We placed a few on both the top and bottom of the hoop.
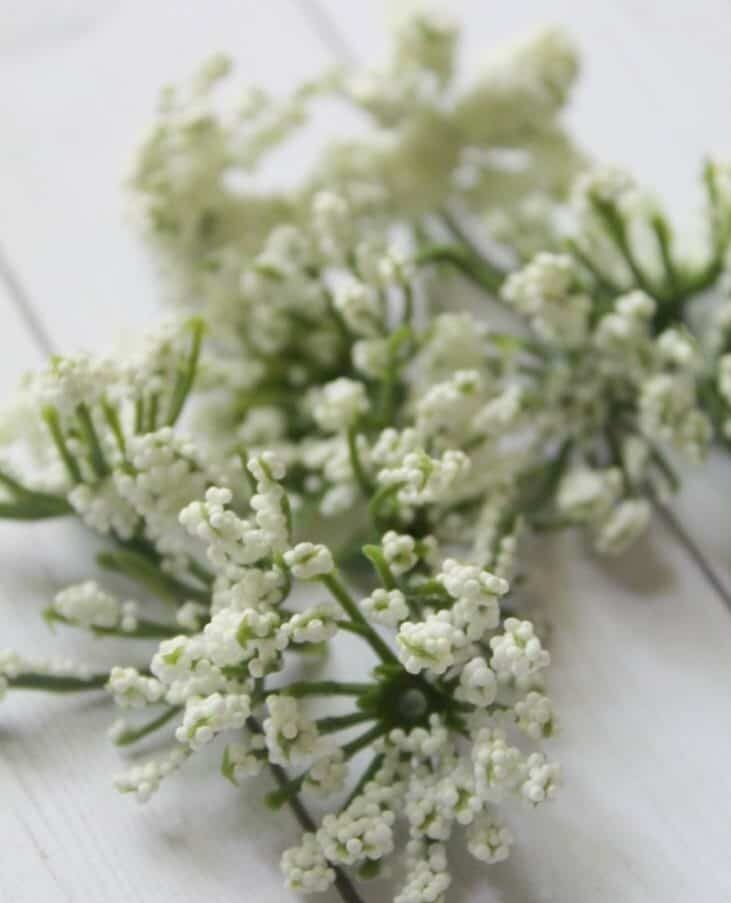
Seventh Step: Once all of your pieces are dry, your Hello Wreath is ready to be displayed. You can add ribbon for hanging or simply hang it as is.
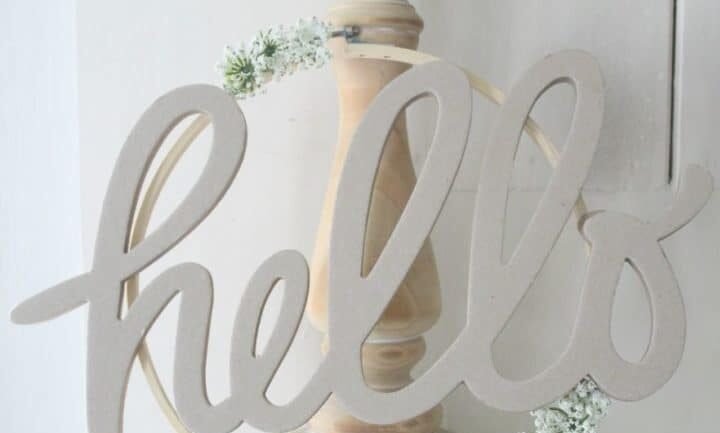
Optional Tips For This Farmhouse Wreath
You can do all sorts of things with this farmhouse style wreath to make it your own. Here are a few ideas to try out when you are experimenting.
Paint the “hello” cutout. You can paint the words to give it a pop of color. Turquoise, gray, salmon, white or anything else you can think of would look lovely.
Add different flowers. You can choose anything that you like or goes with your style. If you are making them as gifts or selling them, you can use a variety of flowers too.
Choose a different word. I love “hello” because I wanted it as a front door wreath. But you could pick words like Family, Love, Faith, Home, Farmhouse or whatever else you like.
What Is The Proper Height To Hang A Wreath?
You should try to hang your wreaths around 57 inches above the floor. This isn’t a rule that is set in stone, so do what fits your style, but that is average eye height for most people. You don’t want to go lots higher or lots lower because it will be challenging to get a good look. The great thing about this wreath is you could lean it up against something or hang it! Works both ways beautifully.
How Do You Secure A Wreath To A Door?
I find the easiest way to secure a wreath to a door is by using a ribbon or some rope. You just need to tie it around the wreath and hang it on a small nail or hook. Easy peasy and it looks fantastic.
2. Aroma Diffuse

Almost no time left? Gifts budget exceeded?
No problem. Copy these 5 DIYs gift ideas for her: they’re last minute ideas, dollar store fiendly but they look so pretty and out of a shop! You won’t go wrong!
//
Quasi finito il tempo? Superato il budget regali?
Nessun problema. Copiate queste 5 idee regalo per lei fai da te: sono last minute, low budget ma sono davvero carine e sembrano uscite da un negozio. Non sbaglierete!
After my 5 last minute DIY gift ideas for him post, it’n now time to talk about ladies. Yes, because even if finding a nice gift for women can be easier than for a man (the world of things we like/use has almost no limits), this not means that everything can be the right gift. We should always think about who will receive the present if we want to avoid embarassing-fake-smiles-situation at the opening. Like for men, even for women opting for DIY can be life-saving, cause you’ll make her understand how care you put to make her happy. Here 5 last minute she will love!
//
Dopo il mio post sulle 5 idee di regali fai da te per lui, è giunto il momento di parlare di donne. Già, perché anche se trovare il regalo giusto per una femmina può essere più facile che per un uomo (il mondo di cose che amiamo/usiamo non ha quasi confini), ciò non significa che qualsiasi cosa vada bene. Dovremmo sempre pensare a chi riceverà il dono se vogliamo evitare imbarazzanti situazioni di sorrisi finiti all’apertura. Come per gli uomini, anche per le donne optare per il fai da te può salvare, dato che dimostrerete quanta cura ci avete messo nel farla felice. Ecco 5 idee che lei adorerà!
***
1)
DIY QUOTE CANDLES // CANDELE CON SCRITTE FAI DA TE
The perfect thing to create a beautiful atmosphere. // L’oggetto perfetto per creare una bella atmosfera.
You need // Vi occorre:
Candles. // Candele.
Indelible markers. // Pennarelli indelebili.
How to // Come procedere:
Just write on the candles your thoughts, or use someone else’s quotes you like. Be creative! For those who want to know, I chose one from Latin poet, Catullo. // Semplicemente scrivete i vostri pensieri sulle candele o copiate le frasi di qualcun altro che vi piacciono. Siate creative! Per chi se lo chiede, io ho scelto una poesia di Catullo.

2)
DIY FLORAL NEOPRENE EARRINGS // ORECCHINI FLOREALI IN NEOPRENE FAI DA TE
Something really easy to make but looking so precious. Cause bijoux are always a good idea! // Semplicissimi da fare, ma molto belli. Perché un bijoux è sempre una buona idea!
You need // Vi occorre:
Neoprene.
Cutter. // Taglierino.
Pencil. // Matita.
Earring hooks. // Ganci per orecchini.
Multihole punch. // Pinza fustellatrice.
How to // Come procedere:
Draw and cut your favourite floral shape and cut it, then use it as a sample to cut the second one. Make 2 holes (one for each piece) on the top and insert hooks. Easy, not? // Disegnate e ritagliate una forma floreale, poi usatela come campione per tagliare anche la seconda. fate 2 buchi (uno per pezzo) in alto e inserite i ganci. Facili, no?

3)
DIY CRYSTALS PENCILS // MATITE CON CRISTALLI FAI DA TE
How to write down your thoughts with style! // Come scrivere i propri pensieri con stile!
You need // Vi occorre:
Pencils with flat top. // Matite con estremità piatta.
Crystals. // Cristalli.
Glue. // Colla.
How to // Come procedere:
Just glue the crystals on the top of your pencils to create this super cool stationery must-have. I’ve done some for myself, too! // Semplicemente incollate i cristalli sulla parte superiore delle matite per creare queste bellezze. Io ne ho fatte alcune anche per me!


4)
DIY MARBLE MEMO HOLDER // PORTAMEMO IN MARMO FAI DA TE
Okay, this is actually fake marble, but…who cares? It’s still looking so good, isn’t it? // Okay, in realtà è finto marmo ma…a chi importa? Resta comunque bello, non trovate?
You need // Vi occorre:
Squared cardboard. // Cartoncino quadrato.
Adhesive marble paper. // Carta adesiva marmorizzata.
Memo block. // Blocchetto di memo.
Pen. // Penna.
Scissors. // Forbici.
How to // Come procedere:
Cover the cardboard with marble paper, then cut 2 little rectangular pieces of marble paper, one longer than the other, paste them together so that extremities of the longer one are free, then paste them to the covered cardboard (this semi ring will keep the pen). Add the memo block and you’re done! // Ricoprite il cartoncino con la carta marmorizzata, poi tagliate 2 piccoli rettangoli di carta marmorizzata, uno più lungo dell’ altro, ed incollateli tra loro, così che le estremità del più lungo siano libere, che attaccherete poi al cartoncino ricoperto (questo semi anello servirà a tenere la penna). Aggiungete il blocchetto di memo e avete fatto!

5)
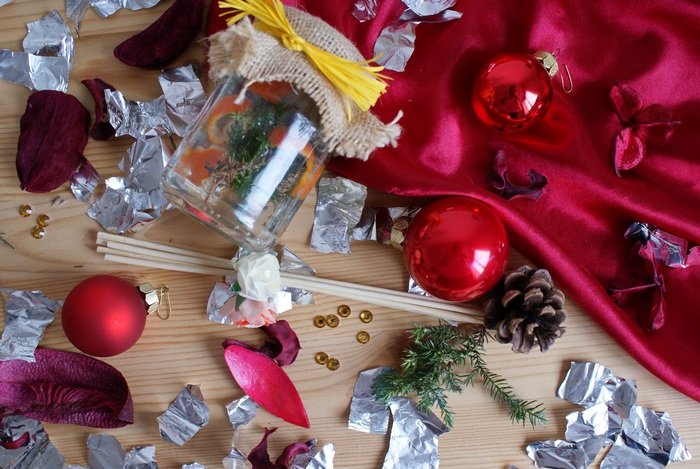
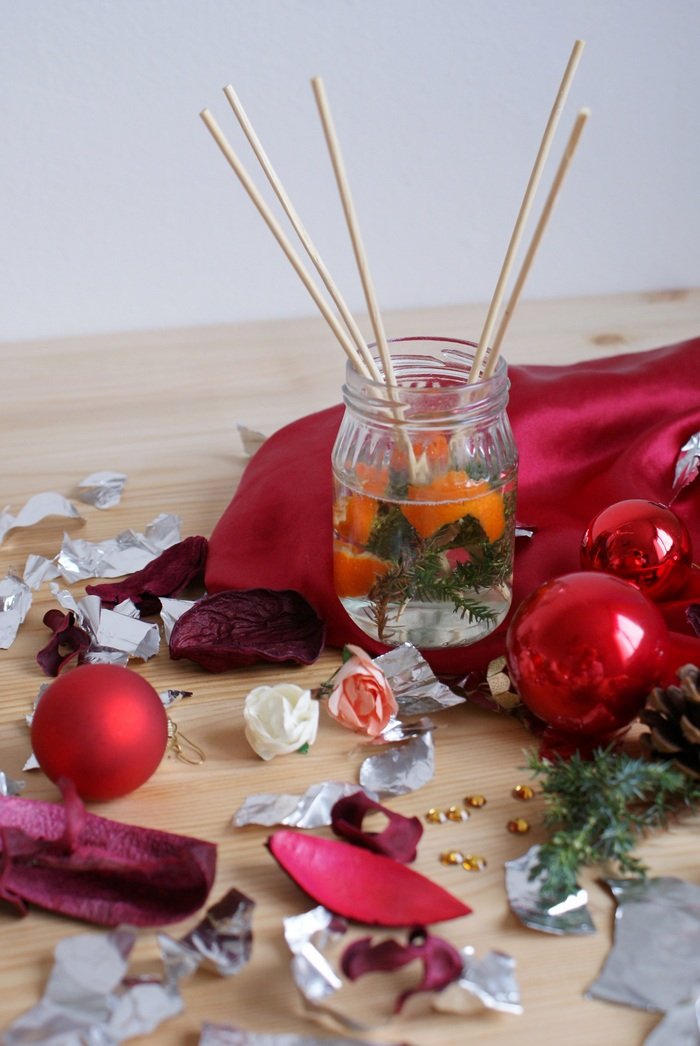
DIY AROMA DIFFUSER FOR HOME // DIFFUSORE DI AROMI PER AMBIENTI FAI DA TE
Nothing better then coming back home and being enveloped by a delicious scent. This homemade version of the expensive diffusers you find in the shops will be so satisfying that you’ll want to make one for you too! // Niente di meglio che tornare a casa ed essere avvolti da un delizioso profumo. Questa versione fatta in casa dei costosi diffusori che trovate nei negozi sarà talmente soddisfacente che ne vorrete una anche per voi!
You need // Vi occorre:
Jar. // Barattolo.
Chopsticks (those for cooking are perfect). // Bastoncini di legno (quelli da cucina sono perfetti).
Essential oil. // Olio essenziale.
“Ingredients” for the scent (choose your favourites!). I opted for orange peel, thyme, pine sprigs. // “Ingredienti”per il profumo (scegliete i vostri preferiti). Io ho optato per scorze di arancia, timo, rametti di pino.
Baby oil. // Olio per bambini.
Water. // Acqua.
How to // Come procedere:
Fill the jar with baby oil and water, add some drops of essential oil and the other ingredients. When packing be sure to close the jar with its topper (but it’s so obvious!). To use the diffuser, just insert the chopsticks and overturn them (about) once a day. The perfect gift for a delicious Christmas scent! // Riempite il barattolo con l’olio per bambini e l’acqua, aggiungete qualche goccia di essenza e gli altri ingredienti. Quando fate il pacchetto siate certe di chiudere col suo tappo (che mi pare ovvio!). Per usare il diffusore, inserite i bastoncini e girateli (circa) una volta al giorno. Il regalo perfetto per dare un delizioso profumo natalizio alla propria casa!
Did you like these ideas? As I told you, I am so in love with these that I actually made one of each for me too! // Vi sono piaciute queste idee? Come vi ho detto, le adoro talmente tanto che le ho fatte anche per me!
3. DIY Aromatherapy Room Spray (Made With Perfume Samples)
Wondering what to do with all those mini perfume samples? Make a DIY aromatherapy room spray to freshen up your home in a completely customizable way.

Don’t you think most air fresheners are a bit overpowering? Scents like strawberry fields, Hawaiian breeze, and pumpkin pie spice can just be too much.
I want my house, my bathroom, and my car to smell great without giving me a headache. Is that too much to ask?
The Most Luxe Room Spray Ever?
I recently concocted the most delicious, luxurious, best-smelling room spray.
It made my house smell like a Parisian boutique, a spa, or a rainforest. Or something in between.
And I made it using a few products I had at home, including those little perfume samples they give away in cosmetic sample bags and department stores.
The finished product was a room spray that is light and fresh. It’s cheap to make and totally customizable. You should make some for yourself and some to give away as a gift.

How To Make DIY Aromatherapy Room Spray
I recently found myself with an overabundance of perfume samples. Since I knew I wasn’t going to use all of that perfume on myself, I decided to experiment with a homemade room spray.
Basically, I started out by spraying perfume into a glass bottle that I filled with distilled water.
The perfume-water mixture was nice, as expected. But then I went a bit further and added some essential oils to the mix (mostly lavender, lemon, and grapefruit). I liked this mixture even better.
As I started using up the room spray, I decided to refill it with more water, a different perfume, and more essential oils. It still smelled amazing.

To Make Your Own, Here’s What You’ll Need:
2 ounces distilled water
1 sample vial of perfume or a mix of two scents (your choice)
10+ drops essential oil (your choice; lavender, lemon, grapefruit, orange, pine, etc.)
You really can’t go wrong. If you like the perfume you are using – and you like the essential oils you are adding – you will probably like the scent. If not, no biggie. Start over with a different mix.
What To Do With Perfume Samples
Do you have a lot of perfume samples to use up? There are several uses for them aside from just spraying them on the inside of your wrist or neck. Try these:
– Keep a few samples in your travel bag. They are TSA-friendly and won’t take up much space.
– Use a few drops of a sample in a diffuser or a bowl of water to create a DIY aromatherapy atmosphere in your home or office.
– Spray a few paper towels or small cloth with perfume and/or essential oils and store it in your car, closet, garage or anywhere else that needs some freshening.
– Try making this DIY solid perfume, pictured below.


